Creating a Loan
- From the Main menu, select CREATE NEW LOAN under the Loan
Transactions menu group. The Create New Transaction screen
provides a list of all configured transaction types.
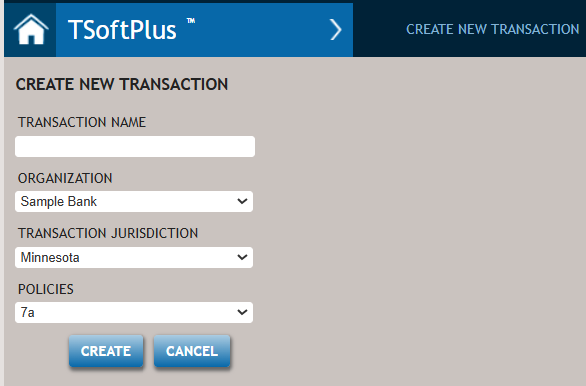
- The Transaction Name can be entered now or added later on the loan’s Summary page.
- Choose the organization for this new loan from the ORGANIZATION
list.Note:The Organization list contains all organizations that are setup in Administration. The organization defaults to the one assigned to a particular user. If that user is assigned to a parent organization, they will be able to see and select from all child organizations from the list.
- If no value was entered for the jurisdiction field in Administration, you
will need to select a state from the Transaction Jurisdiction dropdown
list when you create a new loan.Note:When a transaction is created, the Document Execution State (a Document Options question and primarily needed for the Note) defaults with the Transaction Jurisdiction State. It can be overridden within Options --> Data Fill-In.
- Select a product from the Policies dropdown list.
- Any product created in Administration is listed.
- When a transaction type is selected from the Policies dropdown, the CREATE button is enabled.
- Click the CREATE button to move to the Loan Parties page.
Data entered in the transaction is saved in multiple ways—for example, automatically as you move between pages, or manually when you exit the transaction and confirm the save in the navigation prompt.