Viewing Aliases by Account
This section explains how to view aliases for a particular account.
- Click the Manage Aliases link from the Home tab, or select the Manage Aliases tab.
- The Aliases page appears; click View Aliases by Account.
-
Enter an Account Id in the corresponding field and click
List to display aliases for a specific account. Users can select the
XPath 1.0 checkbox for the desired alias to enable XPath 1.0
Compatibility Mode. The Actions column displays Redirect and
Remove links.
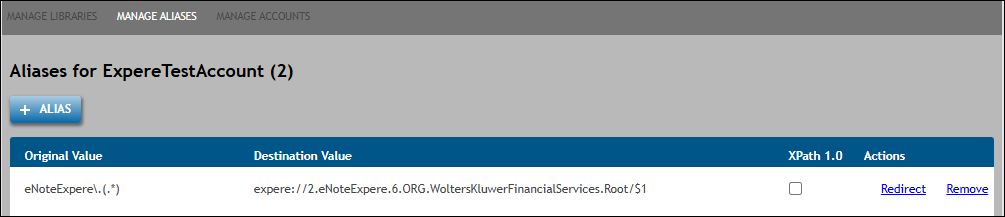
Note: The value entered in Account id field is limited to 255 numeric characters. - To remove a an alias, click the Remove link next to the desired alias. See Removing an Alias for more information.
-
To redirect an alias to point
to a new library version or new content
repository; click the Redirect link next to
the desired alias.
Note: If the library in question has any existing configurations in EZ Config, DGS will display the following message:Continuing with this update will repost the organizations, products, policies, packages, and packets for ALL accounts using this alias in EZ Config.
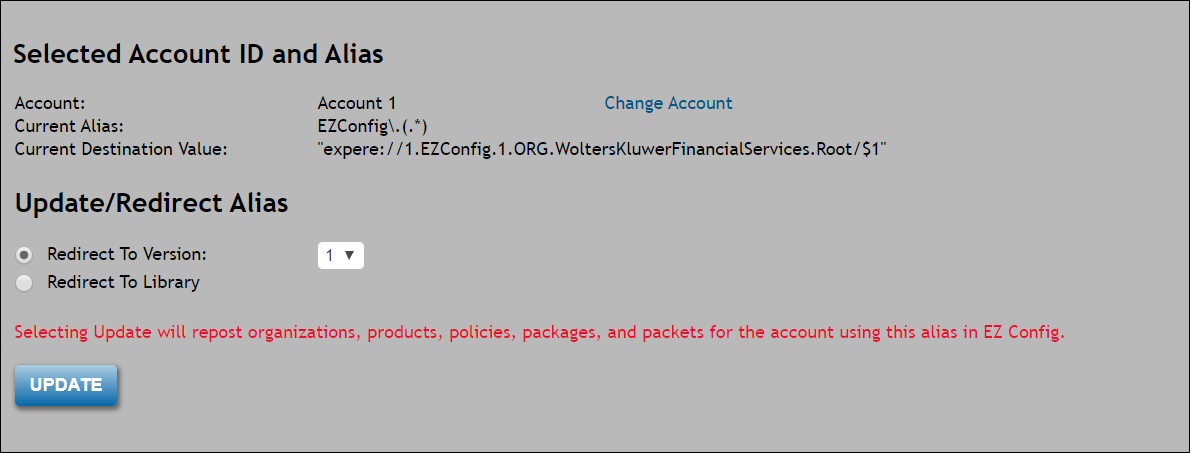
- If necessary to change the account to display the list of available aliases, click Change Account In the Selected Account ID and Alias section.
- In the Update/Redirect Alias
section, select one of the following option
buttons:
- Redirect To Version: select an updated version number from the corresponding dropdown. This number will be the new version of the newly-deployed library. For example, if entering a new value of "2," the previous value of "expere://1.Commercial.1" now appears as "expere://1.Commercial.2."
- Redirect To Destination: select a
library from corresponding dropdown. This dropdown provides a list
of all libraries to which the account has access. Select a
repository from the ORG: dropdown.
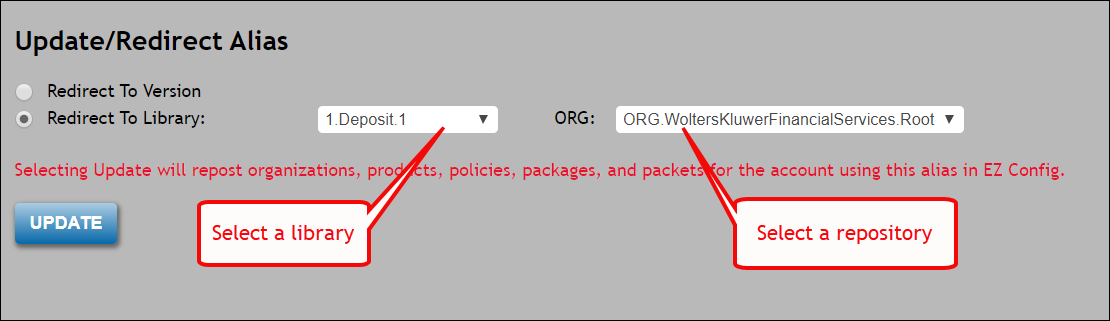
- Click UPDATE to repost the information to EZ Config and update the Management database. A progress indicator appears during the redirect process.
- To add an alias, click the +Alias button at the bottom of the page. See Assigning Aliases.