Barcodes as an Ancillary Output Option
To implement a barcode, you need to first identify the need for a barcode on a document. Then, define the requirements for the barcode, including its appearance, labeling, and type. After that, you must submit a request with instructions for the barcode and the transaction data needed to process the barcode instructions.
Barcodes are only applied to documents that are generated by the Expere Document Services, Document Generation Services, and Expere IE. Barcodes are added to all pages within the generated document and any documents within a package. It is not possible to selectively apply barcodes to specific pages within a document.
The barcode object can be submitted as part of the AncillaryOutputObjects on a document generation request to generate barcodes on all documents within a requested package. Alternatively, the barcode object can be submitted on the DocumentSet or Document object on a document generation request to generate unique barcodes on a document by document basis.
- Define the parameters of the barcode in the Barcode object.
- Submit the Barcode object within the AncillaryOutputOptions object in the request.
<exp:AncillaryOutput>
 <!--Zero or more repetitions:-->
 <exp:AncillaryOutputOption>
 <exp:OutputType>Barcode</exp:OutputType>
 <exp:Barcode>
 <exp:Type>barcode128</exp:Type>
 <exp:Pattern>Page_%page%_of_%totalpages%_%date%_Doc_%docsequence%_of_%docsequencetotal%</exp:Pattern>
 <exp:UseCoverPage>True</exp:UseCoverPage>
 </exp:Barcode>
 </exp:AncillaryOutputOption>
</exp:AncillaryOutput>
<exp:AncillaryOutputOptions>
<!--Zero or more repetitions:-->
<exp:AncillaryOutputOption>
<exp:OutputType>Barcode</exp:OutputType>
<exp:Barcode>
<exp:Type>barcode128</exp:Type>
<exp:Pattern>Page_%page%_of_%totalpages%_%date%_Doc_%docsequence%_of_%docsequencetotal%</exp:Pattern>
<exp:UseCoverPage>True</exp:UseCoverPage>
</exp:Barcode>
</exp:AncillaryOutputOptions>
</exp:AncillaryOutput><exp:AncillaryOutputOptions>
<exp:OutputType>Barcode</exp:OutputType>
<exp:Barcode>
<exp:Type>barcode128</exp:Type>
<exp:Pattern>Page_%page%_of_%totalpages%_%date%_Doc_%docsequence%_of_%docsequencetotal%</exp:Pattern>
<exp:UseCoverPage>True</exp:UseCoverPage>
</exp:Barcode>
</exp:AncillaryOutputOptions>
Setting the Barcode Height
- Right-clicking the Barcode element and selecting . The Height element is added and given focus.
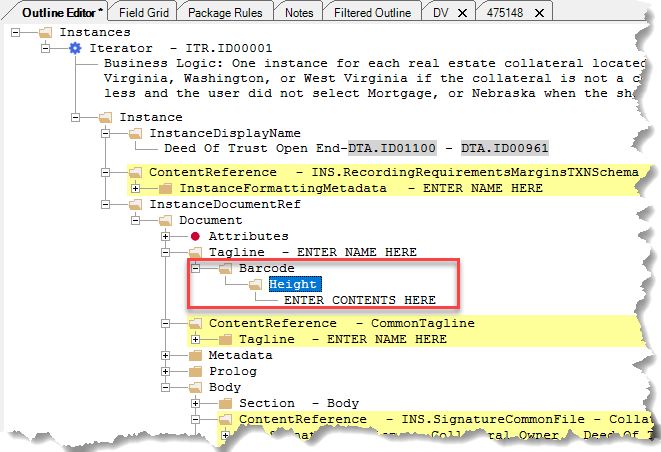
- Double-click the associated contents (ENTER CONTENTS HERE) and type the
desired height in inches or points. Examples: 0.67in or
32pt.Note:
- Values entered in points are automatically converted to inches.
- If you change the barcode height, it is recommended to test the barcode with scanning software for readability.