Adding a Template
Overview
The process template page is where a workflow process is defined and edited. Tasks, decisions, gates, phases, stop, and end points can be added to create a workflow.
Add a Process Template
- Select Process Templates under General Settings in the left pane.
- Select
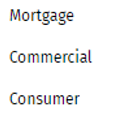
 .
. - Select the appropriate line of business.
- Complete the Process Properties pane. Enter a name for the process.
- The name cannot exceed 100 characters.
- The name must be unique.
- Create the workflow diagram by adding tasks, decisions, gates, phases, and/or stops.
Connect the elements by dragging arrows from one element to
another element. Note: Tasks, decisions, and gates must be connected by at least one inbound and one outbound links (arrows). Stops must be connected by at lease one inbound link.
- Task: Add a task by completing one of the following and completing the Properties
pane. For Help information, select Task.
- Select and drag
 to the diagram.
 - Select and select New Task, a
custom task if available, or a default task if
available.
- Select and drag
- Decision: Add a decision by completing one of the following and completing the
Properties pane. For Help information, select
Decision.
- Drag
 to the diagram.
 - Select and select New Decision
or a default decision if available.
- Select and select Manage
Library. Select a task from the library.
- Drag
- Gate: Drag
 the to the diagram and
complete the Properties pane. For Help
information, select Gate.
the to the diagram and
complete the Properties pane. For Help
information, select Gate. - Phase: Drag
 to the diagram and
complete the Properties pane. For Help
information, select Phase.
to the diagram and
complete the Properties pane. For Help
information, select Phase.
- Task: Add a task by completing one of the following and completing the Properties
pane. For Help information, select Task.
- Correct any errors. For Help information, select Errors.
- Select
 and Activate
to activate the template so it is available to use in a workflow
process. Templates can also be activated later on the Process
Template grid. For Help information, select Activating/Deactivating a Template.
and Activate
to activate the template so it is available to use in a workflow
process. Templates can also be activated later on the Process
Template grid. For Help information, select Activating/Deactivating a Template. - Select Save to save the changes.