Create a New Static Requirement File
- In the File menu, click New.
- In the New File dialog box, select Expere Requirement Files and then select Static Requirement from the list of available options.
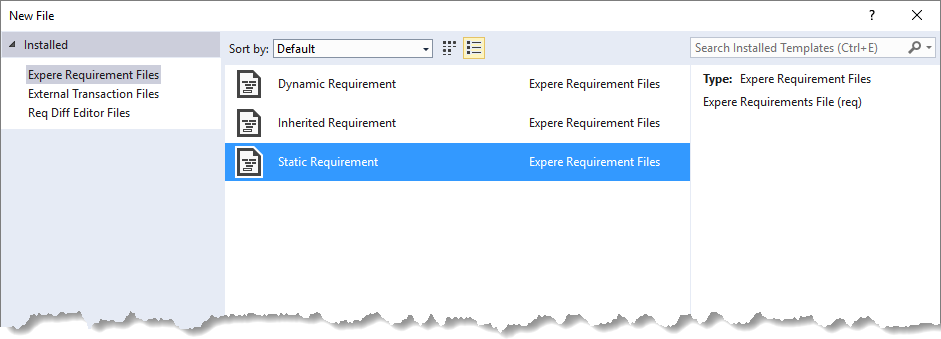
- In the New File dialog box, click Open.The Document Properties dialog box opens.
- Complete the file by filling in the text boxes with information from the
requirements document. For details, refer to Document Properties
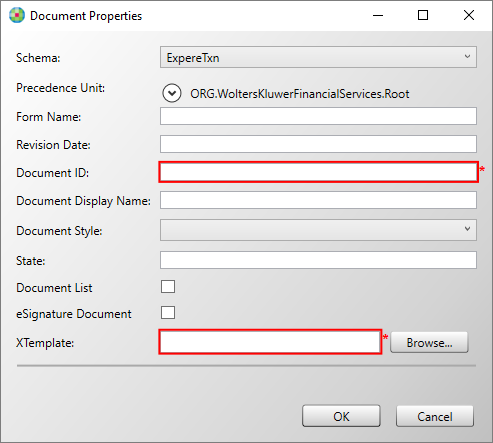 A static requirement file document must have a Document ID and XTemplate defined in order to create the file.Important: Please do not use Document List when authoring Static documents. It’s available today as an option, but it is not supported and will be removed in the future.Note:
- You are able to select Document List on a Dynamic document. The dynamic document will present any Static or Dynamic document name in the list per the request.
- Selecting eSignature Document indicates the document is an eSignature document.
- Click OK.The static requirement file is opened in the Requirements Editor in the Outline Editor view as NewFileNN.req.
- In the Requirements Editor, save the file by clicking File > Save. The best practice is to use the form name as the REQ file name; the target file name will, most likely, be defined in the requirements.