External Graphic
An External Graphic is “called” from the REQ and needs to be located in a specific location. External graphics would be a desirable method when you have a corporate logo and an image/logo for the branches that have their own precedence level. The corporate image file would reside at the base content level; the branch image would be in the precedence level. If the branch does not have an image, the corporate logo from the base level would appear.
The following procedure explains how to call an image into a document using the ExternalGraphic element.
-
In Requirements Editor, open the REQ file and navigate to the
desired position in the document.
The graphic file should be stored with the content (where the REQs are stored) and needs to be available to the author.
-
Select the element and right-click to select Insert Element
Before or Insert Element After, then select
ExternalGraphic.

-
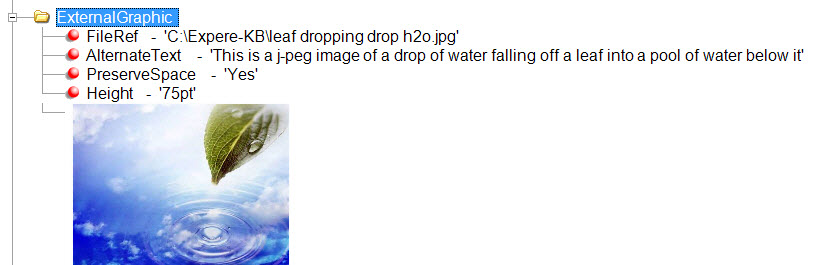
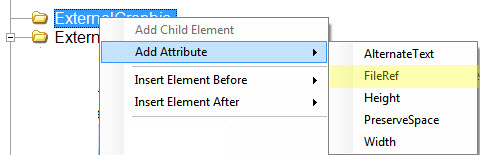
Select the ExternalGraphic element, right-click to select . The FileRef attribute is used for ExternalGraphics; Choose
Picture is used for InternalGraphics.
-
Select the FileRef attribute and enter the complete path
to the graphic file. The image will appear in the Outline Editor tab.
Be sure to include the entire path, including the file name and file extension.
-
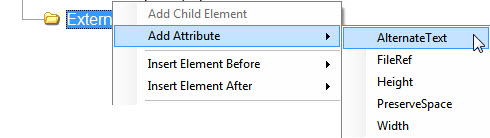
Select the ExternalGraphic element, then right-click to
select . This is a best practice for ADA Compliance.
-
Enter a description of the graphic image that would describe the
image to someone listening to the document being read to them.
There are three additional attributes available for the ExternalGraphics element; PreserveSpace, Height, and Width. All three are considered optional. PreserveSpace is a Yes/No feature that will determine if the physical space will be kept if the file in the FileRef attribute cannot be found. We recommend that authors only use the Height attribute. The value for both Height and Width attributes are a numeric value followed by a unit of measure ex: .5in would reduce the image to only consume space of one half inch high; and if PreserveSpace is set to yes, there will always be a half inch of space – either the image or blank space.The image appears in the Outline Editor tab and appears in the document when assembled.