Managing Fonts
This section discusses configuring Requirements Editor to utilize a custom font collection when rendering output documents. You can add a custom font set from within Requirements Editor or through modifying configuration files.
Note: To change or modify the font and color scheme used in the application
interface, select and then within the Environment section, select Fonts and
Colors.
Adding Custom Fonts Through the Requirements Editor
In the Tools menu, select Add Custom Fonts. This feature is
disabled if an REQ file is open; close any open files before selecting this option.
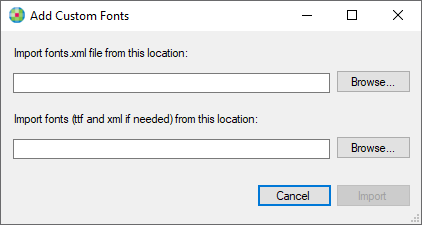
Using this option you can import a fonts.xml file as well as the individual font files (ttf).
Adding Custom Fonts Through Configuration Files
Note: FOP users must have the Apache library installed prior to completing
this procedure.
- Copy the desired font file to the following directory:
- Expere .NET: C:\inetpub\wwwroot\Expere\bin\resources\fonts
- Requirements Editor: C:\Program Files (x86)\Data Management\Requirements Editor\ExpereNet\resources\fonts
- WebSphere: update the ExpereIEServices.ear file at ExpereIEServices.ear\resources\fonts
- Add the desired fonts to one of the following directories, observing the
naming conventions as shown below. Save this file.
- Expere .NET: C:\inetpub\wwwroot\Expere\bin\resources\fonts
- Requirements Editor: C:\Program Files (x86)\Data Management\Requirements Editor\ExpereNet\resources\fonts
- WebSphere: ExpereIEServices.ear\fonts.xml
<fonts> <font name="Agency FB" resource="resources/fonts/AGENCYR.TTF" style="normal" weight="normal" embed="false"/> <font name="Agency FB" resource="resources/fonts/AGENCYB.TTF" style="normal" weight="bold" embed="false"/> <font name="Pi Font" resource="resources/fonts/pifont.ttf" style="normal" weight="normal" embed="true"/> ……… <font name="Verdana" resource="resources/fonts/verdanaz.ttf" style="italic" weight="bold" embed="false"/> </fonts > - Within the <release
version>\Release\BuildFOPFontMetricsInstaller folder, run setup.exe to
launch the BuildFOPFontMetricsInstaller.Note: The install screens follow standard installation protocol; click Next to advance thru each screen. Click Close to exit and complete the installation.
- FOP users: open a command line by selecting Start/Run/Cmd:
- Change the folder to the location where BuildFOPFontMetricsInstaller was installed.
- Run the batch file to see the usage instructions.
- Copy the .XML file that was created to the appropriate location (reflected in step 1 above).
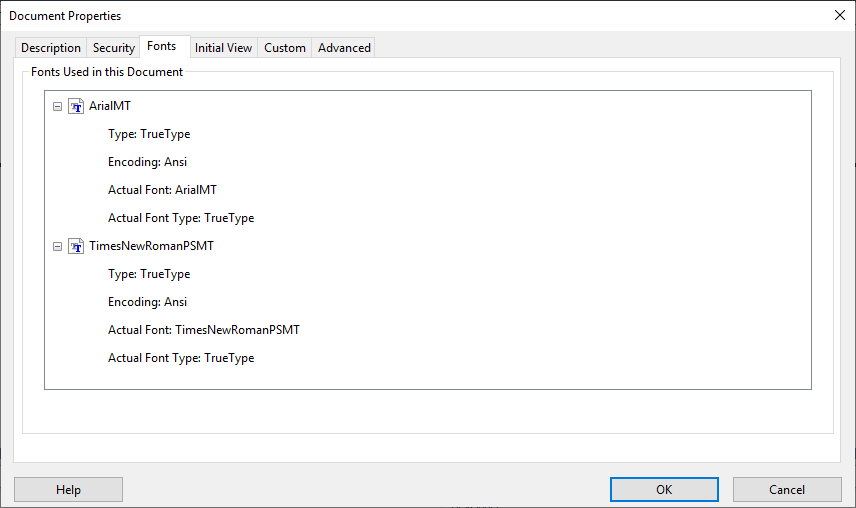
To test this configuration, select in Requirements Editor and right-click in the PDF. Select Document
Properties and, in the Fonts tab, verify that the new font exists.