In most cases you will be working with a collection of files contained
within a repository when creating new files or modifying existing files. Requirements
Editor allows you to open a content file (REQ or other XML file) that is contained
within a repository or outside a repository. There are several different ways to access
files for authoring; for example, you might
- copy a file or group of files from a repository in a build folder
to your local machine,
- work directly in a repository on your local machine or network
share, or
- access a repository from a content library contained on a CD or
other media.
Each REQ file is associated with a repository through the content
references contained in the file. While you can author an REQ outside of a repository;
the content references must resolve to the repository to which they point. These
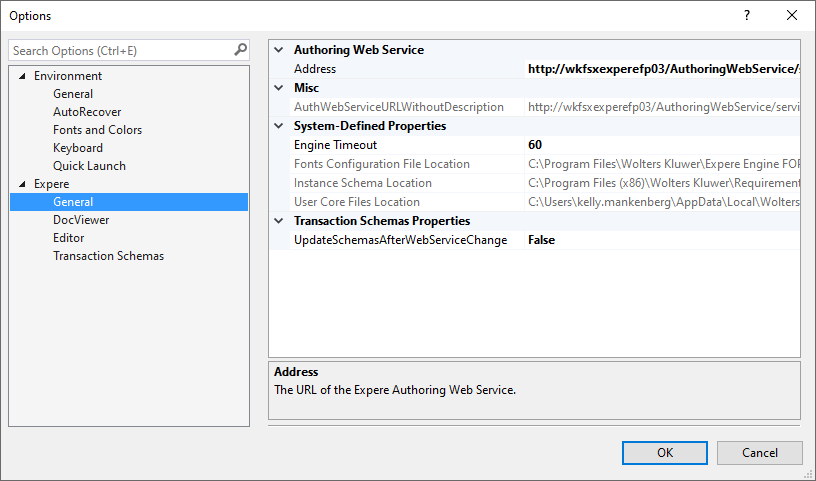
pointers are defined in the Authoring Web Service that the Requirements Editor is
configured to access in the
Options dialog box. In order for an REQ to resolve
content references and successfully generate a document, Requirements Editor must be
pointed to a valid repository accessible to the Authoring Web Service. The Expere
Authoring Web Service is defined in the
Options dialog box ().
Note: The
Enable/Disable Authoring
WebService button on the Toolbar menu () allows you to connect and disconnect from the Web Services.
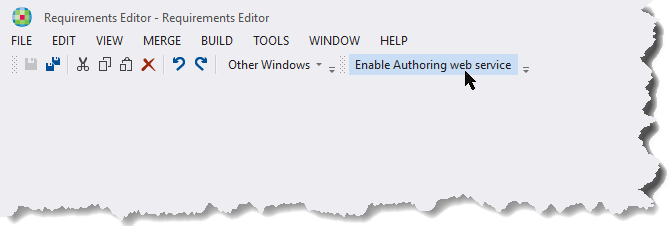
This button is
available even if a document is not opened within Requirements
Editor.
Multiple Authoring Web Service Configuration
There are times that an author will be working two or more Content Repositories and
will need to be able to update content depending on the repository. In order to help
the author know what repository they are working out of you can add a name to the
URL that has your repository. In order to do this you need:
- Create a CSV file,
- Column A holds the URL.
- Column B holds the Name you wish to see for the URL.
- Navigate Tools → Add WebServices URL Names...
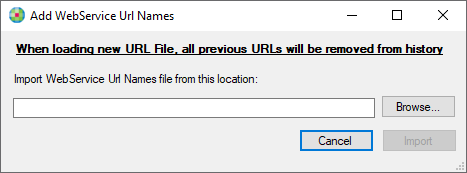
- Using the browse button navigate to the .CSV file that was created above,
click Import.
You can navigate the Options and under 'Address' you can click the drop down
and see all imported address.
Note: During the execution of this, you will lose all URLs that are in the history of
Address.
About the Expere Knowledge Base Repository
Content is often accessed through an Expere Knowledge Base repository
corresponding to a particular release, build, or line of business. Most often,
content is saved back to the same repository or new content files are created and
saved to a particular repository.
An Expere Knowledge Base repository contains content that, ultimately,
is used to generate compliance documentation for financial transactions. For the
purposes of this guide, there will be two repositories discussed: the authoring
repository, where custom content is created and integrated with Wolters Kluwer
content, and the build repository, which may be deployed to a production environment
or to another environment such as testing. The content in the authoring repository
will generally be under some type of source control or content management system
that will place (“check out”) files on the file system to be edited. You can open
these files from the file system into Requirements Editor.
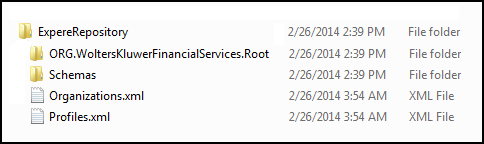
When installed, the standard repository structure consists of a file
system folder containing a folder named
WoltersKluwerFinancialServices.root,
which contains Expere content organized in sub-folders, and an XML file,
Organizations.xml, that contains information about the repository
structure. Within the repository root, the repository is organized to contain
folders for each line of business (LOB). From a customer perspective, each LOB is
licensed independently; consequently, Wolters Kluwer has organized the repository
folder structure to contain a folder for each LOB. The folder structure also
contains common and shared files that are used across LOBs. At the LOB root folder,
the repository is contained in the ExpereRepository folder and will look something
like this: