Using the Test Web App interface - Create Session using REQ data
This option is used to typically to debug a locally-installed .REQ, not that from a deployed content library. Much of the functionality is similar to that of the Using the Test Web App interface - Create Session using transaction data section; consult that section for more information.
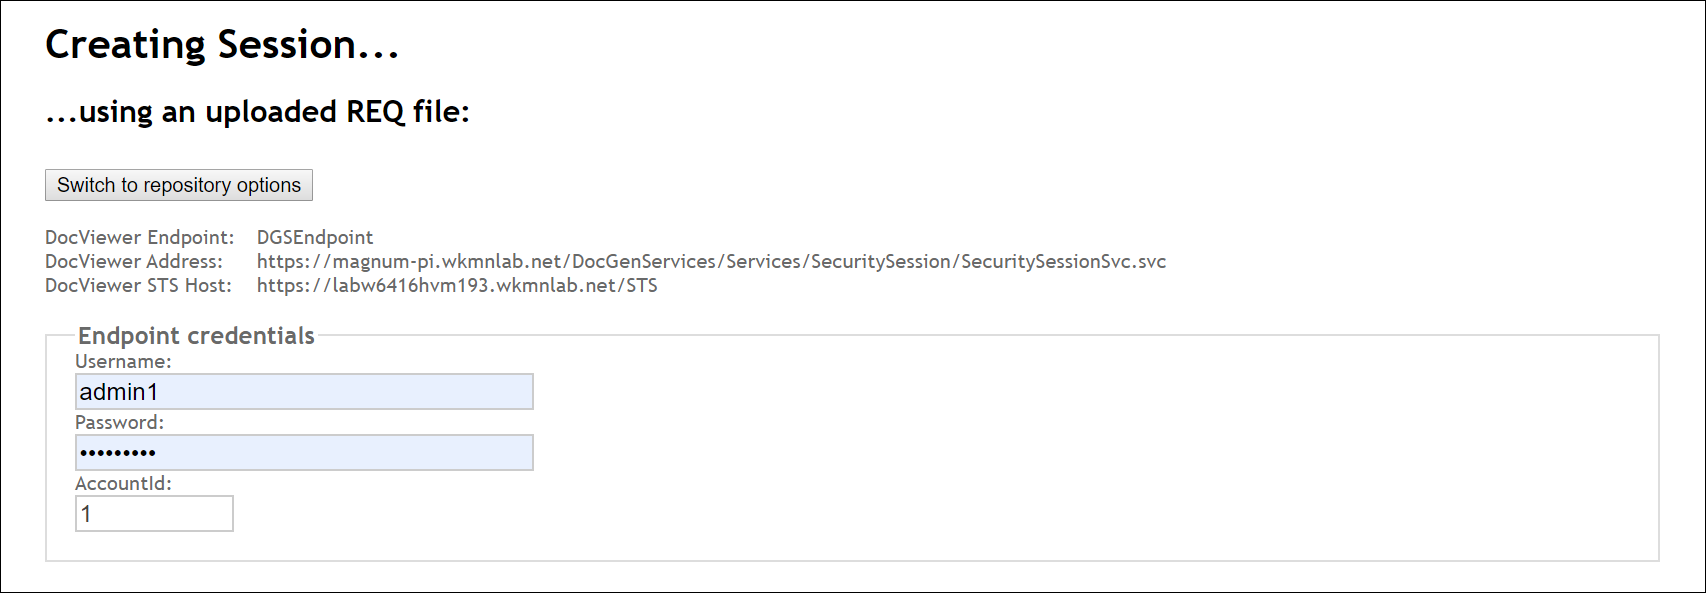
- If using an .REQ file, click the Switch to REQ options button. If the Test Web App is in ".REQ mode," click the Switch to repository options button to return to using transaction data.
-
Enter your Username and Password login credentials; enter a value
in the AccountId field.
Note: The login credentials you use correspond to a particular environment to which you are connecting. The AccountId corresponds to the STS account that contains content that you wish to access (for example, that of the EDS); this particular account id is used to resolve the alias.
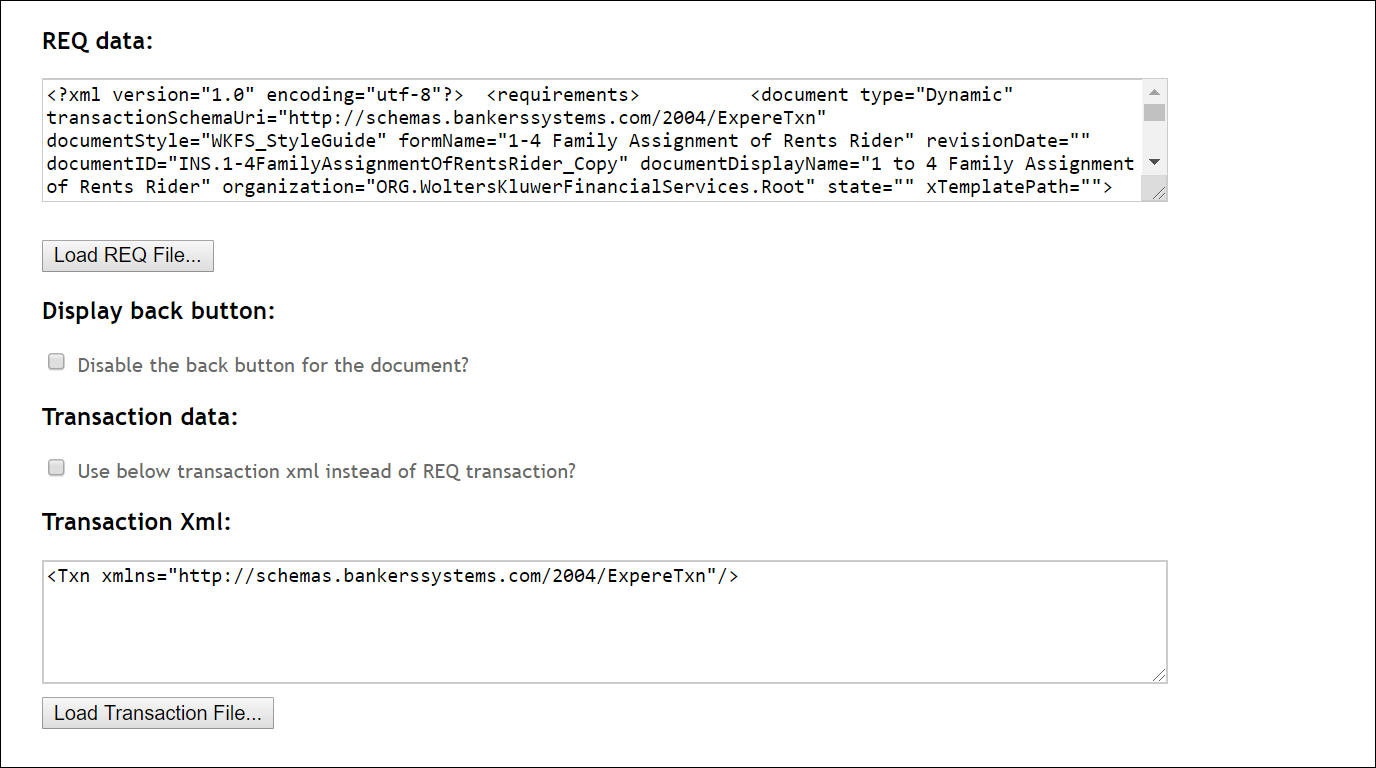
- Click the Load REQ file button to load the contents of the desired .REQ file.
- In the Display back button: section, click the Disable the batton button for the document? checkbox to prohibit users from returning to the DOCUMENT OPTIONS page in DocViewer.
-
Your .REQ may already contain embedded transaction information; however you may
wish to load a different transaction .XML file. In the Transaction Data
section, click the Use below transaction xml instead of REQ transaction?
checkbox to use transaction xml in the Transaction Xml: field.
-
If using an overlay dictionary, enter the Overlay dictionary name in the
corresponding field. By default the Merge overlays to the parent checkbox
is checked.
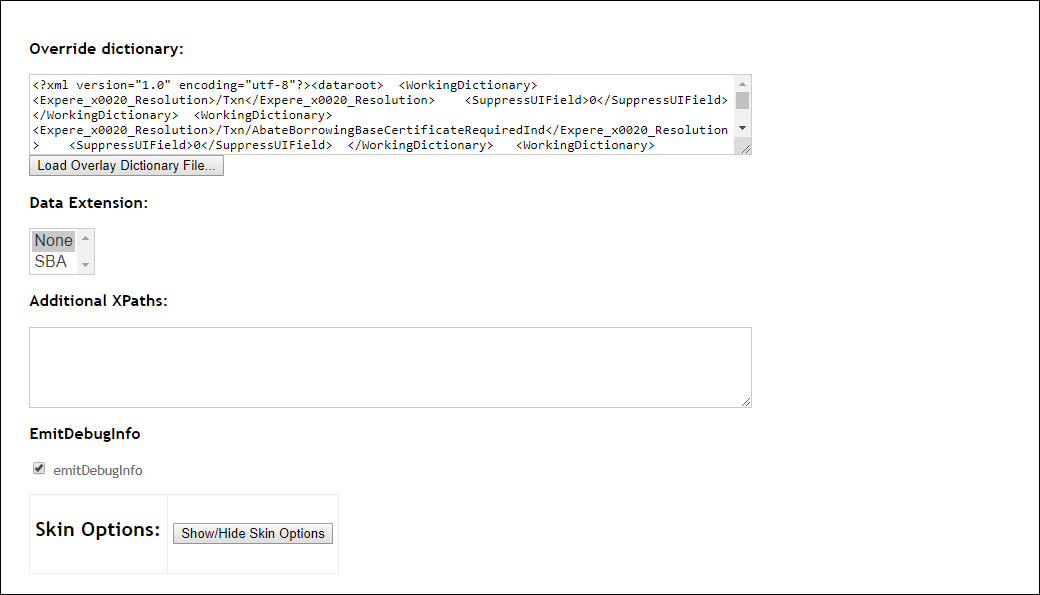
- The Data Extension: dropdown is typically not used.
- The EmitDebugInfo: checkbox is typically not used.
- To select Skin Options:, click the Show/Hide Skin Options button. For more information, see UI Customization.
- Click the Start Doc Viewer option to launch DocViewer.