SmartSign Plus Release Notes - 2024
3.0The effective date for SmartSign Plus within the scope of this document for this release is March 2024.
Features and Enhacements
| Mailings: Support for Multiple Addresses |
|---|
|
| Summary: SmartSign Plus now supports multiple addresses in TRID
packages. For any packages that include participants who live at different
addresses, separate mailings can be configured to send printed copies to
each of those addresses. Note that if a document is hidden from any
participant(s), they will not receive a printed copy of said document.
Admin Settings Changes This Print Fulfillment page is now used to define all the properties related to print fulfillment functionality. Important: The mailings functionality is backwards compatible with the existing Print Fulfillment workflow via the POST and PATCH package calls. In order for these workflows to be successful, customers must configure default values here on the Print Fulfillment Admin Settings page. 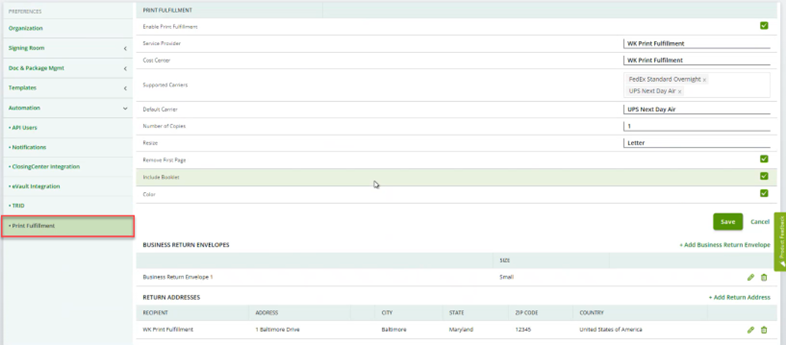 The following fields have been added in support of the mailings functionality:
To enable print fulfillment and specify default print fulfillment settings: (Please note that all fields are required in version 1.)
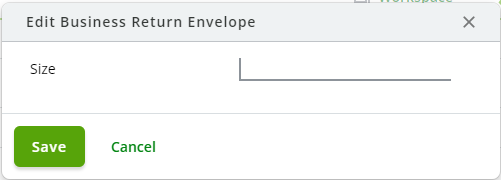
To add business return envelopes: This section allows you to configure the number and size of business return envelopes to include with the package mailing.
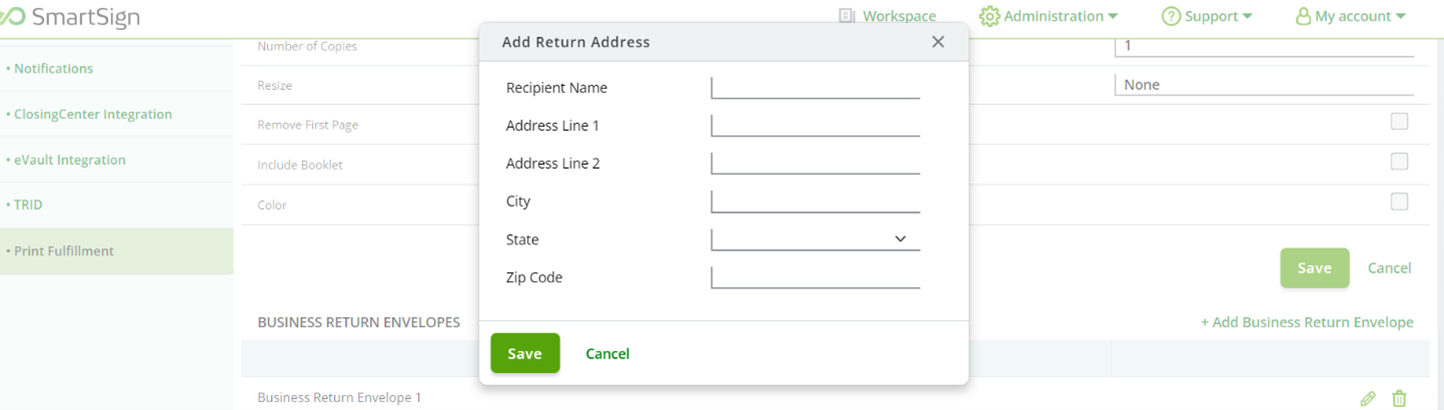
To add return addresses: This section allows you to enter any number of return addresses to use for the package mailing.
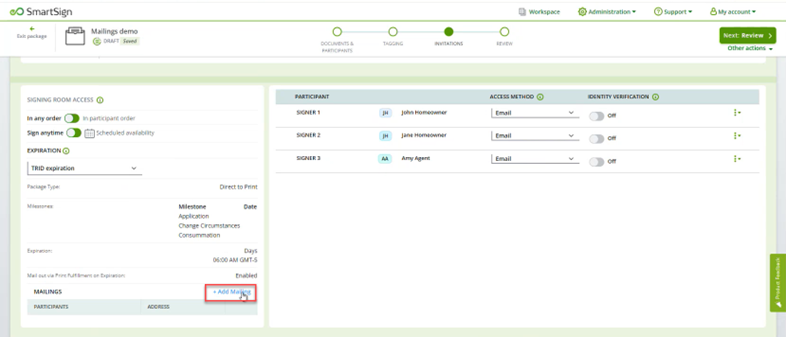
Add additional return addresses as needed. These addresses are available for selection when creating a mailing. Workspace Changes: Step 1 We removed the More custom fields dropdown field that were used to specify mailing address. Instead, the print fulfillment fields are now available in the Print Fulfillment settings section of Admin. Workspace/Package Creation Changes: Step 3 Any mailing information can be entered on a new popup window that displays when the Mail out via Print Fulfilment on Expiration option is set to Enabled. Saving this section displays the +Add Mailing option.
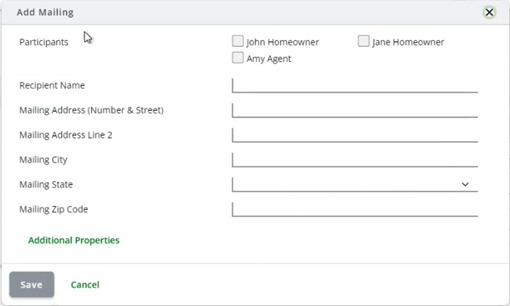
Click +Add Mailing option to display the Add Mailing popup window.
Use this page to select which recipients should receive this mailing. Multiple recipients can be set up via this popup window. For example, you may choose to send a mailing to the borrowers and a separate mailing to the agent. If you have two different addresses, you must configure two separate mailings. Additionally, if recipients have different visibility settings per document, separate mailings must be configured for each recipient. You may also choose to combine recipients to receive a mailing at the same address, such as a package that includes 2 borrowers (ex: a married couple) at the same address. Additional Properties
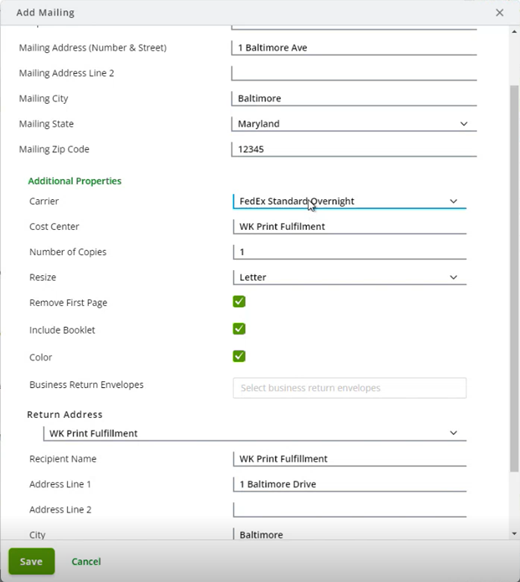
Click Additional Properties to display the print fulfillment options that have been specified for your organization at the Administration level. Information such as Carrier, Cost Center, Return Address, etc. are defaulted based on the settings defined for your organization, but can be modified here for the selected mailing. The Return Address field allows you to enter a custom return address for this package. Select Custom Return Address in the Return Address field, then enter the address details as needed. To complete the Add Mailings popup:
Notes:
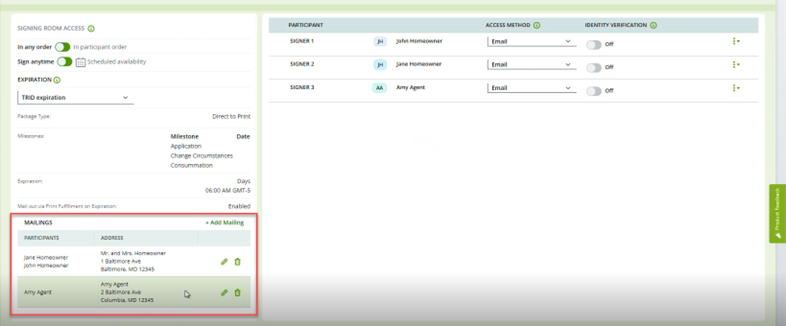
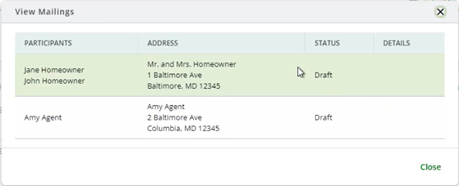
Mailing Summary After mailings are added, a Mailing Summary table displays on the left side of the page, as shown below.
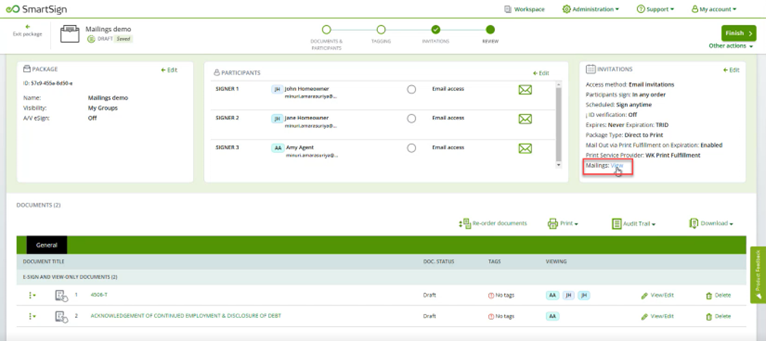
Workspace Changes: Step 4 Changes to Step 4 include the removal of package information from the Package block on the left. We have added a link to view Mailings to the Invitations block on the right.
When clicked, the Mailing summary information for this package displays in full and includes additional information such as tracking information and any error information in the Details column.
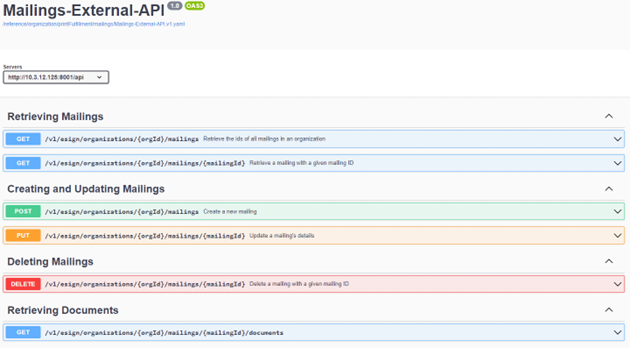
Click Close to exit the popup window. Note: If no mailings are configured for a package with Print Fulfillment enabled, the program displays an error message when you attempt to Finish and warns you that no mailings have been entered for the package. You must return to the Invitations page and configure mailings to continue. If mailings are configured for some, but not all, participants, the program displays a reminder message to indicate that there are participants for whom mailings have not been configured and that if you continue, that participant will not receive a mailing. You are allowed to continue to Finish the package. API Support for Mailings Functionality The aforementioned mailings functionality is also available via API. We have created a new /mailings endpoint that allows you to perform all the above functions via API. Detailed information is available on Swagger pages (links in the API/Swagger section below).
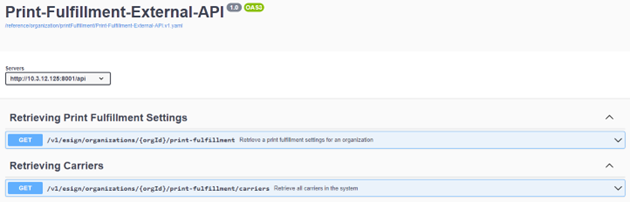
We also have a new /print-fulfillment endpoint that allows you to retrieve all settings configured on the Print Fulfillment Admin Settings page, as well as a /carriers endpoint that retrieves a list of all supported carriers.
|
| Webhelp Online Documentation Available |
|---|
|
| Summary: With this release, SmartSign Plus Release Notes are
now available as webhelp directly from the program. We have updated the
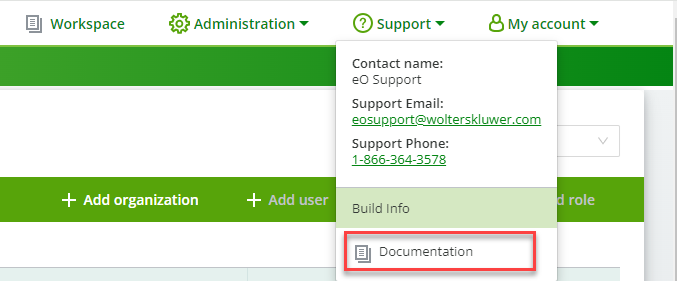
program menu options to include a new Support menu, which contains a
Documentation option.
Select Documentation from the Support menu to launch the SmartSign Plus documentation landing page.
The SmartSign Plus landing page contains links to the available documentation suite. Current release notes are available from this landing page. Click SmartSign Plus Changelog to launch the release notes in a separate browser tab. Note You must be logged into SmartSign Plus to access the documentation. Going forward, this Release Notes document will contain a rolling list of ongoing changes to SmartSign Plus, grouped by release. We will no longer publish a separate set of release notes each release. Version 3.0 Release Notes also remain available in PDF format via the Support Portal; however, this format will be phased out in upcoming releases. Note Archived Release Notes PDF files are available from the Documentation link within the program. |

| Auth0 Integration Changes |
|---|
|
| Summary:
Our 2.6.1 release included the Auth0 integration in preparation for upcoming multi-factor authentication support. This integration changed how we generate and manage tokens, and SmartSign Plus is now subject to the Auth0 rate limit of 20 login attempts per minute per API user as a means of enhancing security and preventing suspicious login attempts. What You Need to Know
Why Are We Doing This
Available Options
Customers or partners who currently reach or exceed this limit should make any necessary changes as soon as possible, as you will potentially experience login and authentication failures if left unchanged. |
| Reporting |
|---|
|
| Summary: Reporting functionality is now available within
SmartSign Plus. This functionality is permission based and allows users the
ability to run and download reports to be used for auditing or other
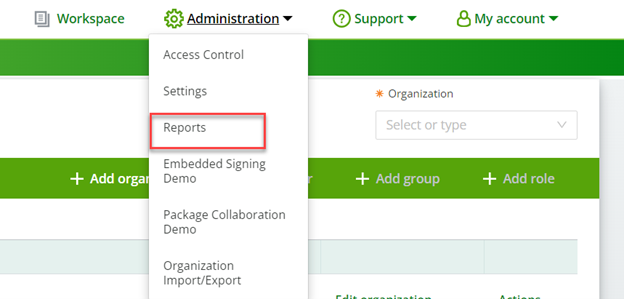
internal business purposes. Admin: New Report Permissions Access to the reporting functionality is based on permission settings defined within Administration. A new View and Manage Reports permission is now available on the Edit Roles page in Administration. This permission provides the assigned users with the ability to run and download various SmartSign Plus reports. This permission is automatically added to the Admin and eoAdmin roles. Reporting A new Reports option is available from the Administration menu.
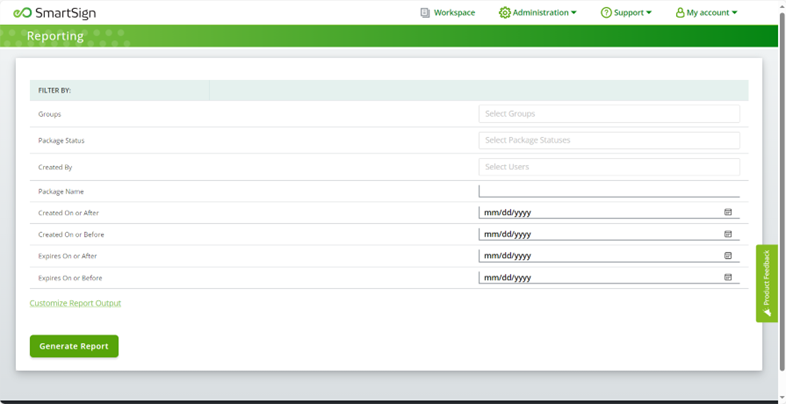
Note: This option is available only to users with the View and Manage reports permission enabled in Administration. When the Reports option is selected, the Reporting page displays.
Use this page to define the criteria you wish to include on the report. The following criteria are available.
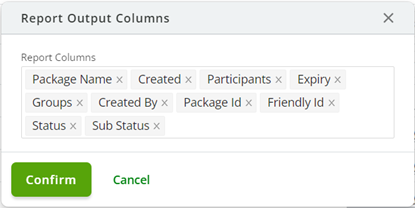
You may also customize the report output; namely, you can remove any report columns you do not wish to include. Click Customizing Report Output to display the Report Output Columns popup window.
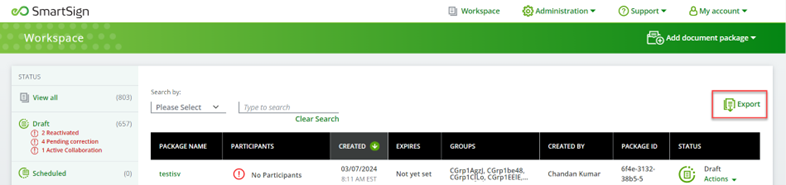
From here, remove any Report Columns you do not wish to include on the report. Click Confirm. Then, on the Reporting page, click Generate Report to have SmartSign Plus create the report, which is generated as a .csv file and downloaded to your default Downloads location. 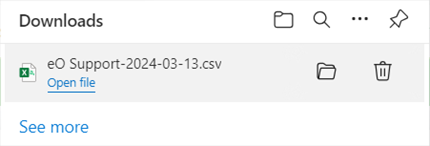 Exporting Workspace as CSV The Workspace now includes Export functionality, allowing you to export data to a tab-delimited CSV file.
Only displayed data is exported; if data is filtered, only the filtered data is exported. |
| Mailing Status Changes Timestamp |
|---|
|
| Summary:
The GET Mailings response now includes the timestamp that is associated with the status changes. |
Defect Corrections
The following bug fixes are included within this release:
- Participant Name Fields now accept both formatted and straight apostrophes. (7794)
- The default expiration date now displays while scheduling a package for expiration. (8246)
- Updating participant email and access method can now be updated successfully via API. (8359)
- Package completion mail is now sent after Signing Room completion.
- Tags set as optional now remain optional and no longer convert to required on documents containing other required fields. (8341)
API/Swagger Updates
Swagger documentation can be found here:
Preview
Staging/Test
https://stg-smartsign.eoriginal.com/swagger-ui/index.html?configUrl=%2Fv3%2Fapi-docs%2Fswagger-configProduction
https://smartsign.eoriginal.com/swagger-ui/index.html?configUrl=%2Fv3%2Fapi-docs%2Fswagger-configThe following API and Swagger change is included with this release:
- Updated the Example Schema for the Merge data API in Swagger. (6373)
API Bugs
The following API bug fixes are included within this release:
- Users can now add third-party E-Sign documents to a package in reactivated draft state via API. (8235)