This section provides detailed on using the various URL's associated with a particular sub-calendar.
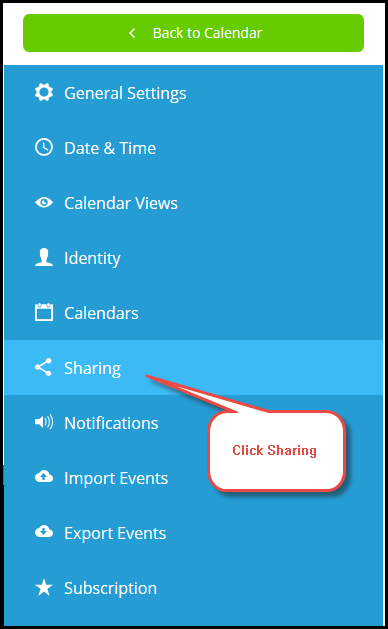
- Click the Settings icon in the upper right corner. Click the Sharing link on the left side of the page.
- To create a new link for a unique group, perform the following:
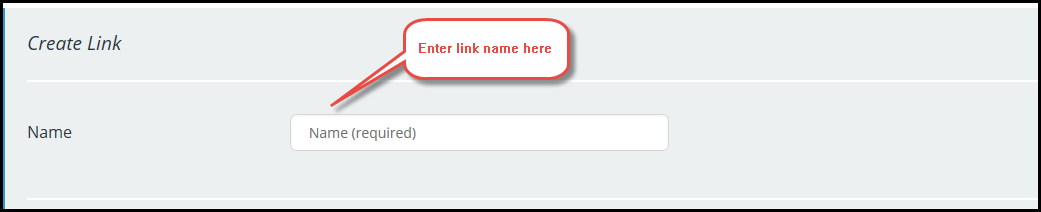
- Click the + New Link button in the upper right corner of the page. The Create Link page appears.
- Enter a Name in the corresponding text field.
- Do not enable the GRANT ADMINISTRATION PERMISSION checkbox. This gives users of this administrative permissions for this link.
- The REQUIRE A PASSWORD FOR THIS LINK is not available with the current plan.
- From the Calendars Shared dropdown, select Selected Calendars.

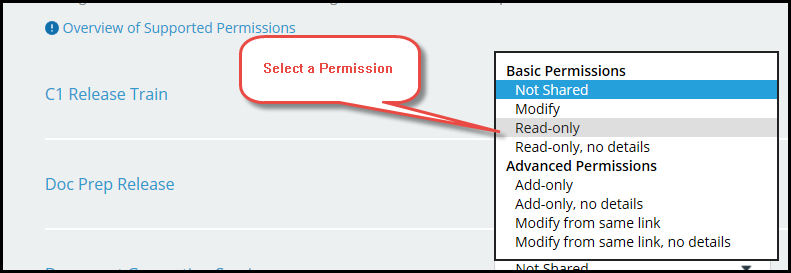
- Select the desired sub-calendar with which to associate the link. From the corresponding dropdown, select a permission. By default, each sub-calendar is Not Shared.
- Click Save.
Test the link by clicking on it from the list of Current Links on the Sharing page.