1. The Welcome to the setup wizardfor Expere Components screen appears.Review the information on the screen. Click Next to advanceto the Installation Options screen.
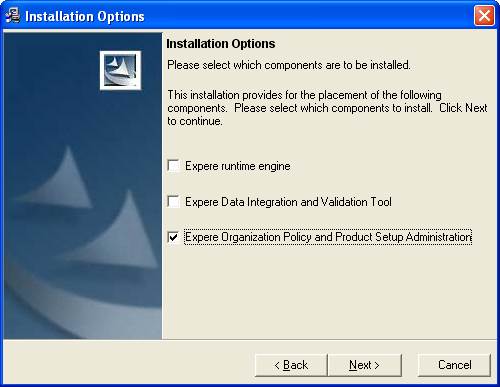
2. In the Installation Options screen, select Expere Organization, Policy,and Product Setup Administration fromthe list of options. In most cases, you will also selectExpere runtime engine.
§ Expere runtimeengine
§ Expere Data Integration and Validation
§ Expere Organization, Policy, and ProductSetup Administration
3. Click the Expere Organization, Policy,and Product Setup Administration checkbox and click Next to advance to the OPPSA Destination Folderscreen.
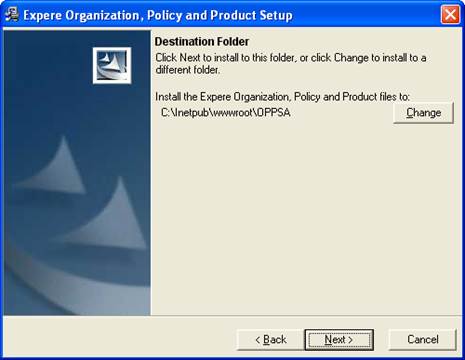
4. In the OPPSA Destination Folder screen,Review the destination folder location. Click Change to selecta different installation folder. Click Next toadvance to the Installation URL screen.
5. In the Expere Organization, Policy, and Product Installation URL screen, enter the OPPSA Installation URL path in the corresponding field.

6. In the Authorization Service DatabaseInformation screen,complete the following fields:
§ Host Name
§ Database Name
§ Database User Name
§ Database User Password
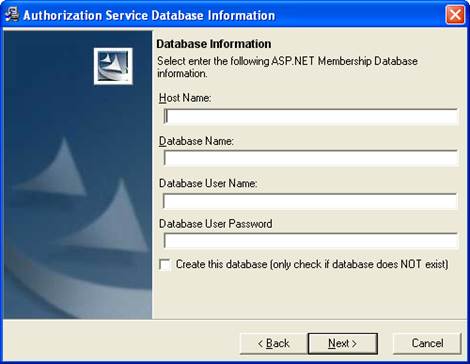
7. Click the Create this database (only check if database does NOT exist) checkbox.

8. Click Next to advance to the DestinationLocation screen.
9. The Setup Details screen displays a list of all applications that will be installed. Review the list; click Back through the installation screensto make any changes. ClickNext tobegin the installation.
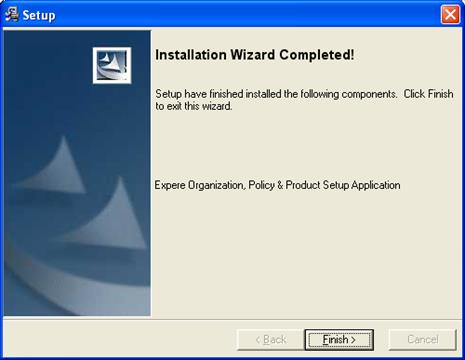
10. The Installation Wizard Completed screen appears, displaying a list of installed components. Click Finish to exit the installation.