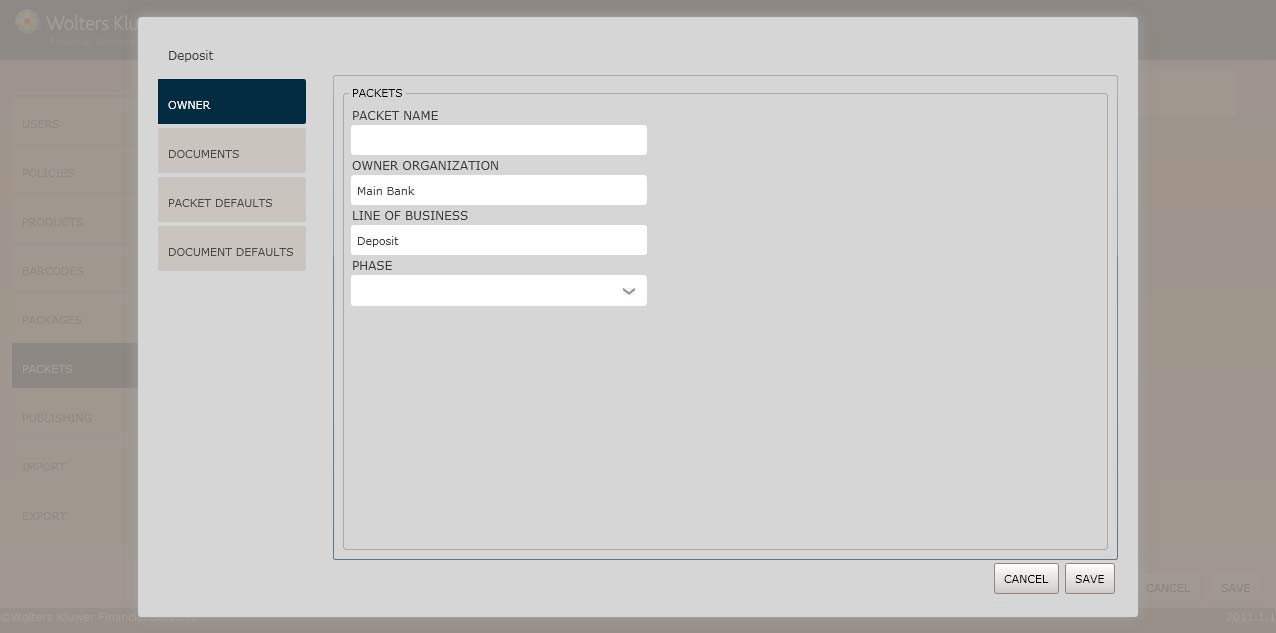
The Packet Name/Owner screen allows users to perform the following:
§ Enter the packet name and assignit to an organization
§ Select a line of business and packet phase
1. Enter a Packet Name in the corresponding dropdown.
NOTE: The packet name cannot containany special characters; the name must contain alphanumeric characters only.
§ The Owner Organization and Line of Businessfields are pre-filled by default and cannot be modifiedon this screen.
2. Select a phase from the Phase dropdown box. This field contains a list of all phases for the line of business selectedabove.
NOTE: This phase list includes custom and LOB standard phases.
The Add Documents/Set Order screen allows users to add documents to a packetand arrange the print order of documents
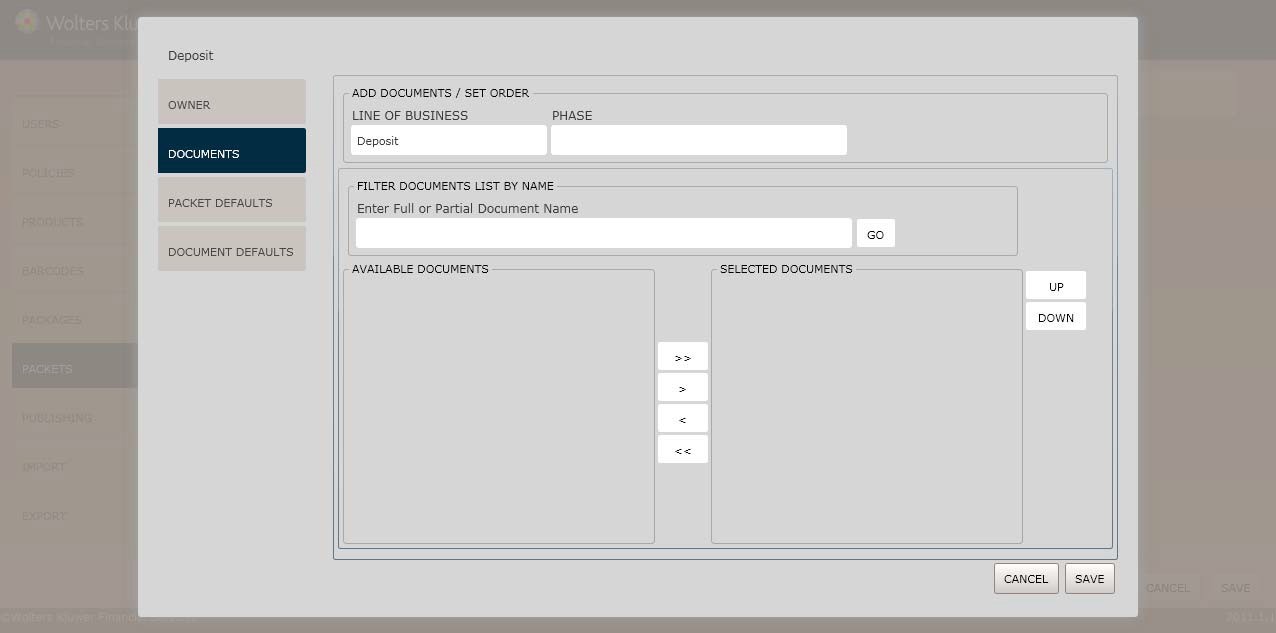
The Owner Organization andLine of Business fields are pre-filled by default and cannot be modified on this screen.
1. Enter a document name in the Filter Documents List by Name field and click GO to display all availabledocuments in the Expererepository.
§ To add documents from the AvailableDocuments listto the Selected Documents, use the ![]() buttons.
buttons.
NOTE: Use the ![]() button to return documents to the Available Documents list.
button to return documents to the Available Documents list.
§ Use the Up and Down buttons to control the print order of the documents. The documents will print in the exact orderas they appear in the SelectedDocuments list.
NOTE: Clickand hold the Ctrl key to selectmultiple documents at the same time.
The Select Defaultsscreen allows the user to set and add the followingdefaults:
§ Packet level
§ Default level
This screenalso allows usersto set any custom metadata values.
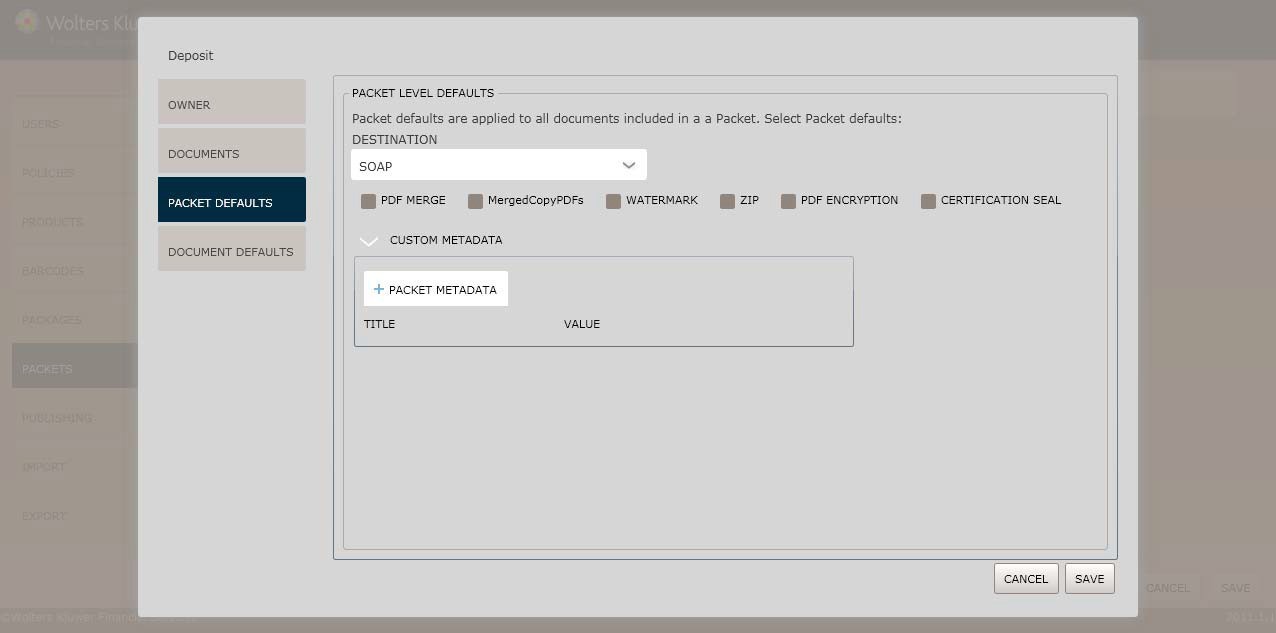
Select one of the followingdestinations from Destination dropdown:
§ SOAP (*default)
§ Printer
§ File System
§ Enablethe PDF Merge checkbox to merge all documents within the packet into a single document.
§ Enablethe MergedCopyPDF's checkbox to create an additional .PDF that contains copies of all the individual documents.
§ Enablethe Watermark checkbox to providea watermark on all documents using the parameters established in the WatermarkSetup screen.See Watermark Setup below.
§ Enablethe Zip checkbox to determine that all documents within the packetare contained in a single zip file.
§ Enable the PDF Encryption checkbox to indicate that all documents containPDF encryption. Selecting this checkboxdisplays the PDF Encryption Setup screen.See PDF Encryption below.
§ Enable the Certification Seal checkbox to indicatethat all documents within the packet contain a certification seal.
Click the arrow next to Custom Metadata,then click the Packet Metadatabutton to enablethe input fields.
Enter a custom metadatavalue in the Title and Value fields.
NOTE: These fields allowcustomers to uniquely describe a packet. This data is returned with the packetat runtime.
NOTE: Any defaults set at a DocumentLevel will overridePacket Level defaults.
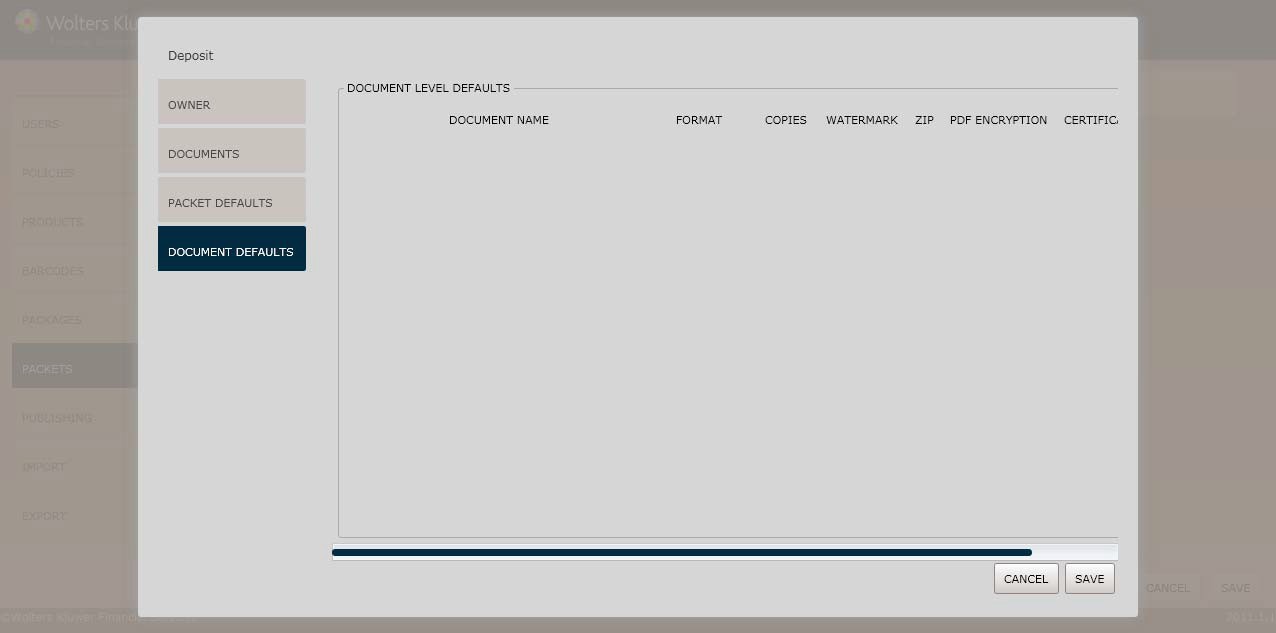
§ Select one of the following output formats from the Format dropdown:
§ PDF (*default)
§ XML
§ Enablethe PDF Merge checkbox to merge all documents within the packet into a single document.
§ Enablethe Watermark checkbox to providea watermark on all documents using the parameters established in the WatermarkSetup screen.See Watermark Setup below.
§ Enablethe Zip checkbox to determine that all documents within the packetare contained in a single zip file.
§ Enable the PDF Encryption checkbox to indicate that all documents containPDF encryption. Selecting this checkboxdisplays the PDF Encryption Setup screen.See PDF Encryption below.
§ Enable the Certification Seal checkbox to indicatethat all documents within the packet contain a certification seal.
The Watermark Setupscreen allows users to configurethe following watermark options:
§ Image
§ Text
![]()
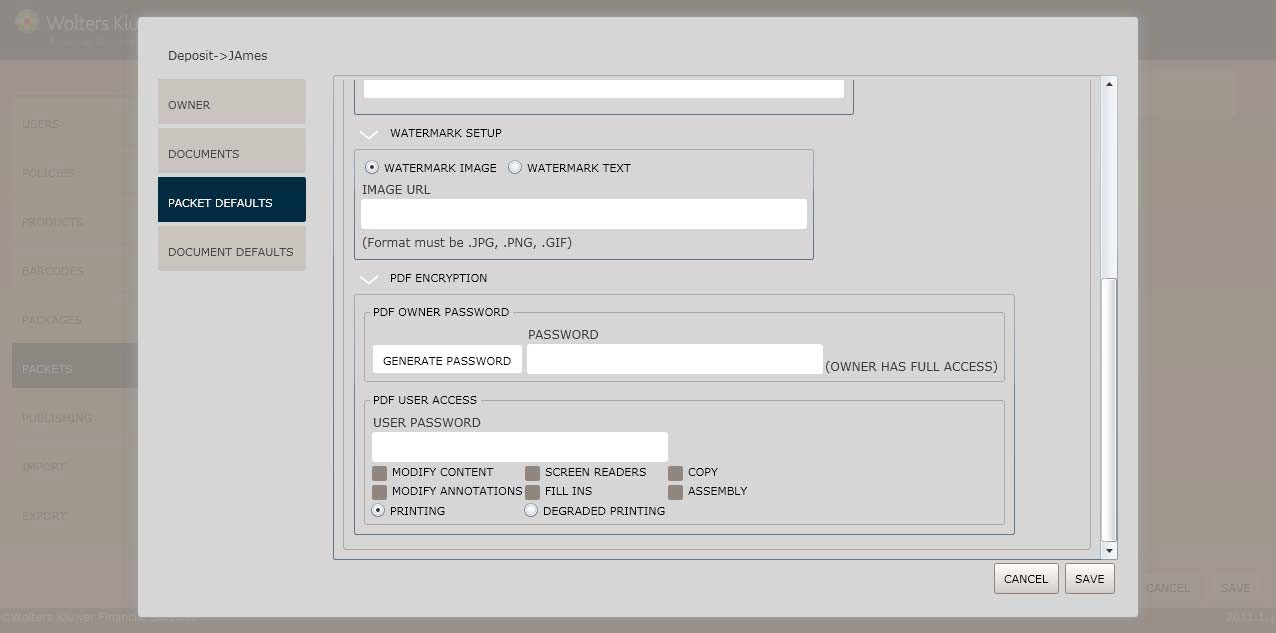
1. Enable the Watermark Image option button to input the URL or LAN addressin the corresponding textbox.
![]()
§ Enable the WatermarkText option button to enter the desired text in the corresponding textbox.
§ Determine the Locationof Watermark from the corresponding dropdown; select one of the following locations:
§ Top
§ Center; if selecting Center, determine if the watermark should be rotated 45 degrees in the Rotate 45 degree dropdown.
§ Bottom
![]()
§ Performone of the following:
§ Click Save to confirm your changes.
The PDF Encryption screen allows users to protect their documents throughvarious methods of encryption. Users can configure the following PDF encryption options:
§ Owner password
§ User access
NOTE: The PDF Encryption screen appears when clickingthe PDF Encryption checkbox on the Select Defaults screen.
This featureallows users to set an owner password on PDF documentsand allow full accessrights to the PDF documents
1. Select an ownerpassword by performing one of the following:
§ Enter a passwordin the corresponding textbox; the passwordcan contain up to 32 characters.
§ Click the System Generatedcheckbox; OPPSA generates a unique 32 character password passedback to the user in the API.
NOTE: Those users with owner passwordcredentials have full access rights to the PDF document.
This feature allows users to set a user-level password on PDF documents and link document encryption levels to a password through OPPSA.
Enter a password in the User Password textbox; the password can contain up to 32 characters and is the same password for all documents in the packet.
Select the corresponding checkboxto assign access rights for the followingfunctions:
§ Modify Content
§ Copy
§ Modify Annotations
§ ScreenReaders
§ Fill Ins
§ Assembly
NOTE: See Access Rights below for more information.
Select the checkboxnext either of the following print options:
§ Printing
§ Degraded Printing
NOTE: See Access Rights below for more information.
Click Save to confirm your changes. Click Cancel to exit the screen.
§ Modify Content: allowsthe contents of the PDF to be modified.
§ Copy:allows copying or otherwise extracting text and graphicsfrom the document.
§ Modify Annotations: allowsadding or modifying text annotations and interactive form fields.
§ Screen Readers: allows extractingtext and graphicsfor use by accessibility devices (128-bit only).
§ Fill Ins: Allowsfilling form fields.
§ Assembly: allows users to insert,remove, and rotatepages and add bookmarks.
§ Printing: Determines whetherthe user is allowed to print a PDF.
§ Degraded Printing: Allows the user to print the documentat a lower quality.
For information on displaying, editingor deleting barcodes,see Managing Packets, earlierin this section.