Logging In

Note: Before you are able to log in to SDX Capture, you must have a registered account on your SDX site.

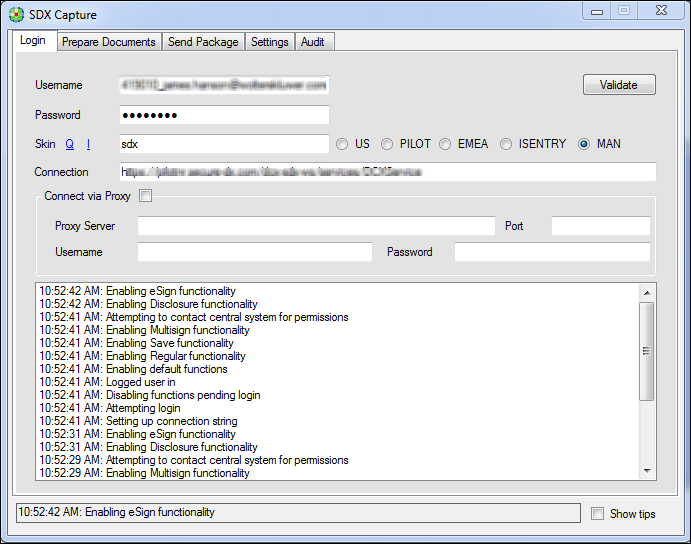
To log in to SDX Capture:

  1. Click the Login tab.

  2. Select Q next to Skin.
    Verify that sdx is entered in the Skin name in the corresponding text field.
  3. Select I next to Skin.
    Verify that sdxins is entered in the Skin name in the corresponding text field.
  4. To connect to the SDX system, choose your SDX Capture URL:
    • If you are a SDX Capture user in the United States, choose US.
    • To test your system, select PILOT.
    • If you are a SDX Capture user in Europe, the Middle East, or Africa, choose EMEA.
    • If you are an iSentry user, select ISENTRY.
    • To manually enter your connection URL, select MAN.
  5. In the Skin box, the skin name should default to SDX. Do not change this value unless instructed to do so by your Wolters Kluwer Financial Services representative.
  6. In the Skin box, the skin name should default to sdxins. Do not change this value unless instructed to do so by your Wolters Kluwer Financial Services representative.
  7. Type or update your Username and Password.
    Note: Your context number:
    • is provided by your Implementation Consultant.
    • must be included as a prefix to your email address. For example, 366005_joe.smith@samplebank.com.
    • changes when going from Pilot to Production.

    Note: When completing the Proxy Server and Port fields, your implementation specialist will assist with this information if necessary for your configuration.
  8. To connect to SDX, click Validate. You are now logged in. You will stay logged in unless you switch usernames or change skins.
    Note:
    • If you switch usernames or change skins, the following message appears:

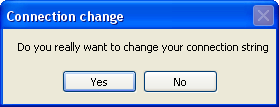
      Click Yes to continue.

    • If you receive an error after clicking Validate, verify your username, password, and connection. Your username and password are the same as your online SDX username and password. The information box should assist you in resolving the issue. For more information, refer to the Note in Step 2.