Toolbars can be customized to make commonly used functions readily available. Oxygen 17.1 in the Vasont environment was used for screenshots for this topic.
How to Configure the Oxygen Toolbar
After opening Oxygen:
Right-click next to an existing toolbar under the Oxygen menu and choose Configure Toolbars from the context menu. If no toolbars are present, choose Windows, Configure Toolbars from the Oxygen main menu.
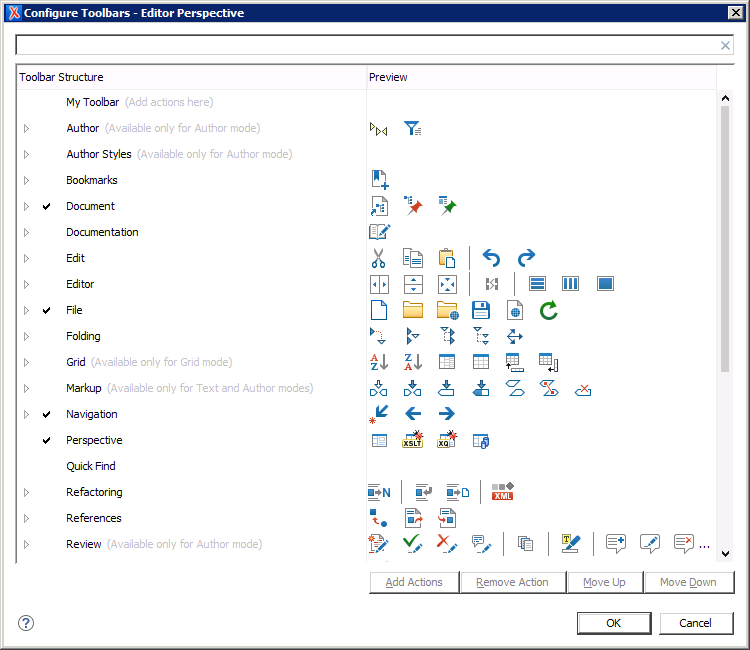
- The Configure Toolbars-Editor Perspective box opens, displaying multiple categories. Existing toolbar selections will have a check mark next to them. Expand each category to see all of the available options. Icons for each option are shown on the right.

- Scroll through the list or use the search box at the top to find a particular toolbar item.
- Once you have found a toolbar item, select it and make sure the checkbox has a checkmark in it.
Click OK to return to Oxygen and the toolbar item has been added to your toolbar.
To remove any toolbar item, simply clear its checkbox from the Configure Toolbars-Editor Preferences box.
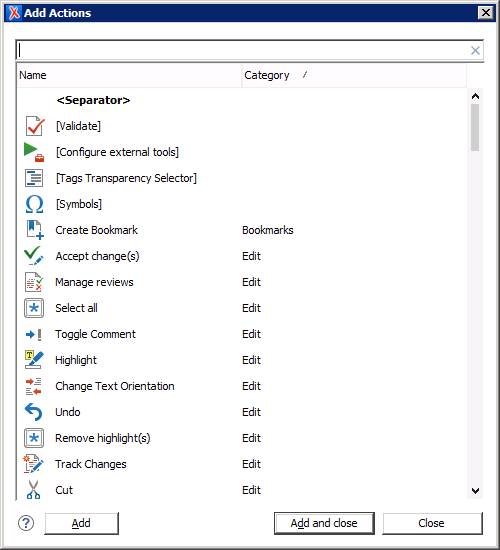
- Some toolbar categories will allow you to add additional actions not displayed in the default list in Configure Toolbars-Editor Preferences box. Select a category and select the Add Actions button at the bottom to display the list of options you can add.

- Select the item to add to a toolbar and click Add or Add and close. Your selection will be added to the Configure Toolbars-Editor Preferences box and to your toolbar.
You can make a custom toolbar by selecting My Toolbar at the top of the Configure Toolbars-Editor Preferences box and choosing Add Actions. This toolbar will initially display in the upper left corner of Oxygen directly beneath the main text menu but can clicked and dragged to any location on the screen.
Related articles